Making a duckbill mask
There seems to be no agreement on the best materials to make a mask. I made mine with quilting cotton for the outer cover. Quilting cotton has a dense weave and will hold up to many washings. I have tons of scraps and used these.
I used a Hoover HEPA vacuum bag for the inner layer. It seemed like a good material for blocking nasty stuff. One thing I read is that some cotton masks increase the risk of getting influenza-like illness. They postulated that it was because moist material holds the virii against the face increasing the risk of transmission to mucus membranes. So, I feel it’s important to change your mask often. Because the HEPA doesnt hold moisture, and it’s not irritating (unlike some materials) I was happy to use it against the face. Avoiding having the mask against the face is also why I chose the duckbill type.
Because the outer mask will carry fomites (virii) from patient to patient, you should attempt to change it often for that reason also.
I used pipe cleaners for the nose piece. I do think that having a way to mold the mask to the nose is important. I’ve seen other materials - like twist ties - used, as well.
For the ear wraps, most people are using 1/8” elastic. However, at this time it’s hard to get. You can cut 1/4”. But I found some very stretchy, lightweight swimsuit fabric that I had left from another project. I love it. It’s not as irritating as the elastic. For people who hate anything on their ears, you can also sew bias ties to the corners.
I used a 1/4 seam throughout. I backstitched at the beginning and end of every seam to increase strength.
This pattern is similar to the one I am using, but I have modified mine a little to my liking. https://www.craftpassion.com/wp-content/uploads/2013/08/TEENAGER_WOMAN_Pocket_Face_Mask_Pattern.pdf
1. CUTTING
Begin by folding your fabric in half so you can cut both pieces out at once
I Used a small rotary cutter, but you could draw the shape on the fabric and cut with scissors

Cut two 2x4” rectangles out of the cotton only

Cut the mask shape from the filter

SEWING
1. Sew the two outward curves(mask center) right sides facing: cotton to cotton, filter to filter
2. Trim the curves by clipping triangles from the seam. Don’t cut the thread!


3. Finger press the seam so it’s opened.

SEW COTTON TO FILTER
Q. Sew right sides together cotton to filter along the long edges.

2. Turn right side out

3. Use something long,like a pencil, to open up the seam. I used a long cuticle stick.

4. Trim the short ends to make them neat.

THE NOSE PIECE
1 insert your nose wire and arrange about centered at the top.

2. Find the end of the wire and pin along the bottom to hold it in place.


3. Sew along your pin line, remembering to back stitch at beginning and end.
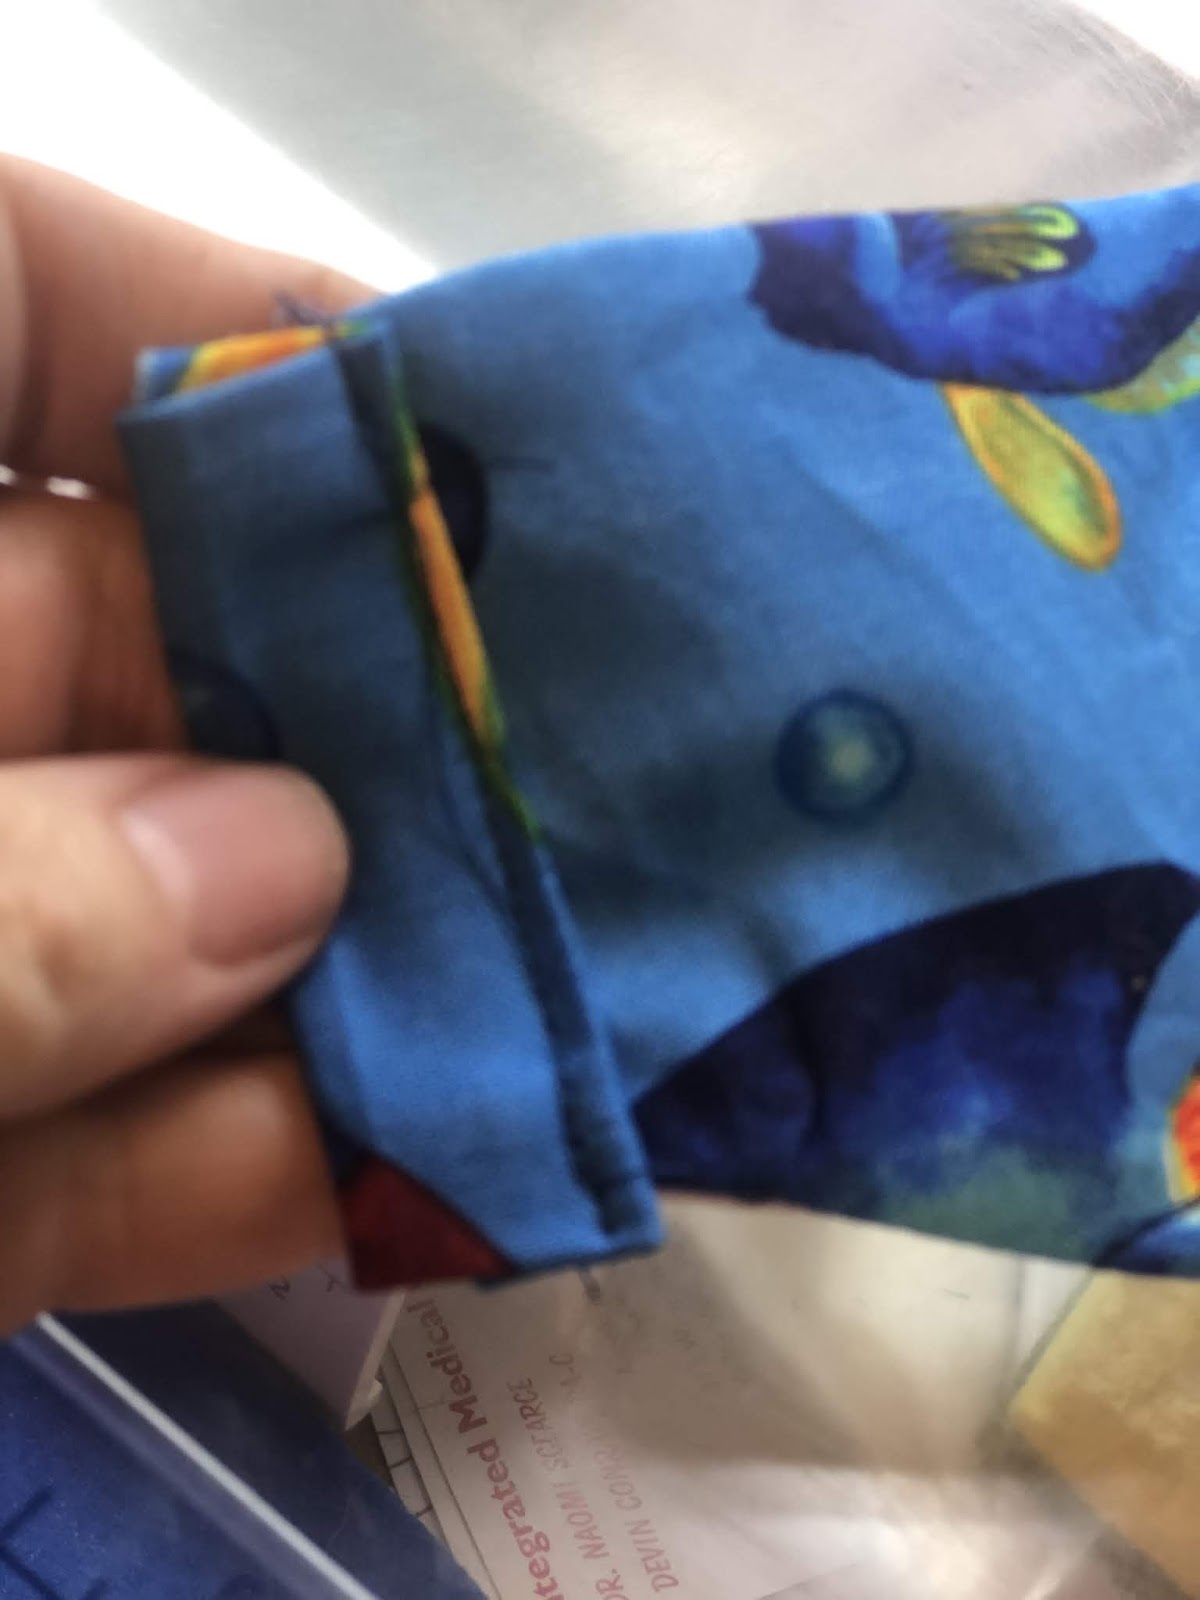
EAR TABS
1. Beginning by making a bias tape from your two rectangles(I know it’s not bias, for you purists.) Fold the rectangles in half lengthwise and press. Open up your fold and fold the long edges to the crease you made and press those.

2. Then fold everything together to that your raw edges are inside and you have 4 layers

3. Open up your folds and make a hem at each short end. Press this hem to hold it.

4. Now fold your bias tape up again. You can see that you have no raw edges showing. Press well to force it to keep its shape.

5. Open up your bias tape again(last time, I promise!) but leave the hems folded. With right side of tape to short side of filter, sew with a 1/8” seam. Remember to backstitch at top and bottom.

6.fold the middle seam of the bias tape around the mask. Fold the edge under and sew it onto the front just over the other seam you just made.


READY TO WEAR

I used a Hoover HEPA vacuum bag for the inner layer. It seemed like a good material for blocking nasty stuff. One thing I read is that some cotton masks increase the risk of getting influenza-like illness. They postulated that it was because moist material holds the virii against the face increasing the risk of transmission to mucus membranes. So, I feel it’s important to change your mask often. Because the HEPA doesnt hold moisture, and it’s not irritating (unlike some materials) I was happy to use it against the face. Avoiding having the mask against the face is also why I chose the duckbill type.
Because the outer mask will carry fomites (virii) from patient to patient, you should attempt to change it often for that reason also.
I used pipe cleaners for the nose piece. I do think that having a way to mold the mask to the nose is important. I’ve seen other materials - like twist ties - used, as well.
For the ear wraps, most people are using 1/8” elastic. However, at this time it’s hard to get. You can cut 1/4”. But I found some very stretchy, lightweight swimsuit fabric that I had left from another project. I love it. It’s not as irritating as the elastic. For people who hate anything on their ears, you can also sew bias ties to the corners.
I used a 1/4 seam throughout. I backstitched at the beginning and end of every seam to increase strength.
This pattern is similar to the one I am using, but I have modified mine a little to my liking. https://www.craftpassion.com/wp-content/uploads/2013/08/TEENAGER_WOMAN_Pocket_Face_Mask_Pattern.pdf
1. CUTTING
Begin by folding your fabric in half so you can cut both pieces out at once

I Used a small rotary cutter, but you could draw the shape on the fabric and cut with scissors

Cut two 2x4” rectangles out of the cotton only

Cut the mask shape from the filter

SEWING
1. Sew the two outward curves(mask center) right sides facing: cotton to cotton, filter to filter

2. Trim the curves by clipping triangles from the seam. Don’t cut the thread!


3. Finger press the seam so it’s opened.

SEW COTTON TO FILTER
Q. Sew right sides together cotton to filter along the long edges.

2. Turn right side out

3. Use something long,like a pencil, to open up the seam. I used a long cuticle stick.

4. Trim the short ends to make them neat.

THE NOSE PIECE
1 insert your nose wire and arrange about centered at the top.

2. Find the end of the wire and pin along the bottom to hold it in place.


3. Sew along your pin line, remembering to back stitch at beginning and end.
EAR TABS
1. Beginning by making a bias tape from your two rectangles(I know it’s not bias, for you purists.) Fold the rectangles in half lengthwise and press. Open up your fold and fold the long edges to the crease you made and press those.

2. Then fold everything together to that your raw edges are inside and you have 4 layers

3. Open up your folds and make a hem at each short end. Press this hem to hold it.

4. Now fold your bias tape up again. You can see that you have no raw edges showing. Press well to force it to keep its shape.

5. Open up your bias tape again(last time, I promise!) but leave the hems folded. With right side of tape to short side of filter, sew with a 1/8” seam. Remember to backstitch at top and bottom.

6.fold the middle seam of the bias tape around the mask. Fold the edge under and sew it onto the front just over the other seam you just made.


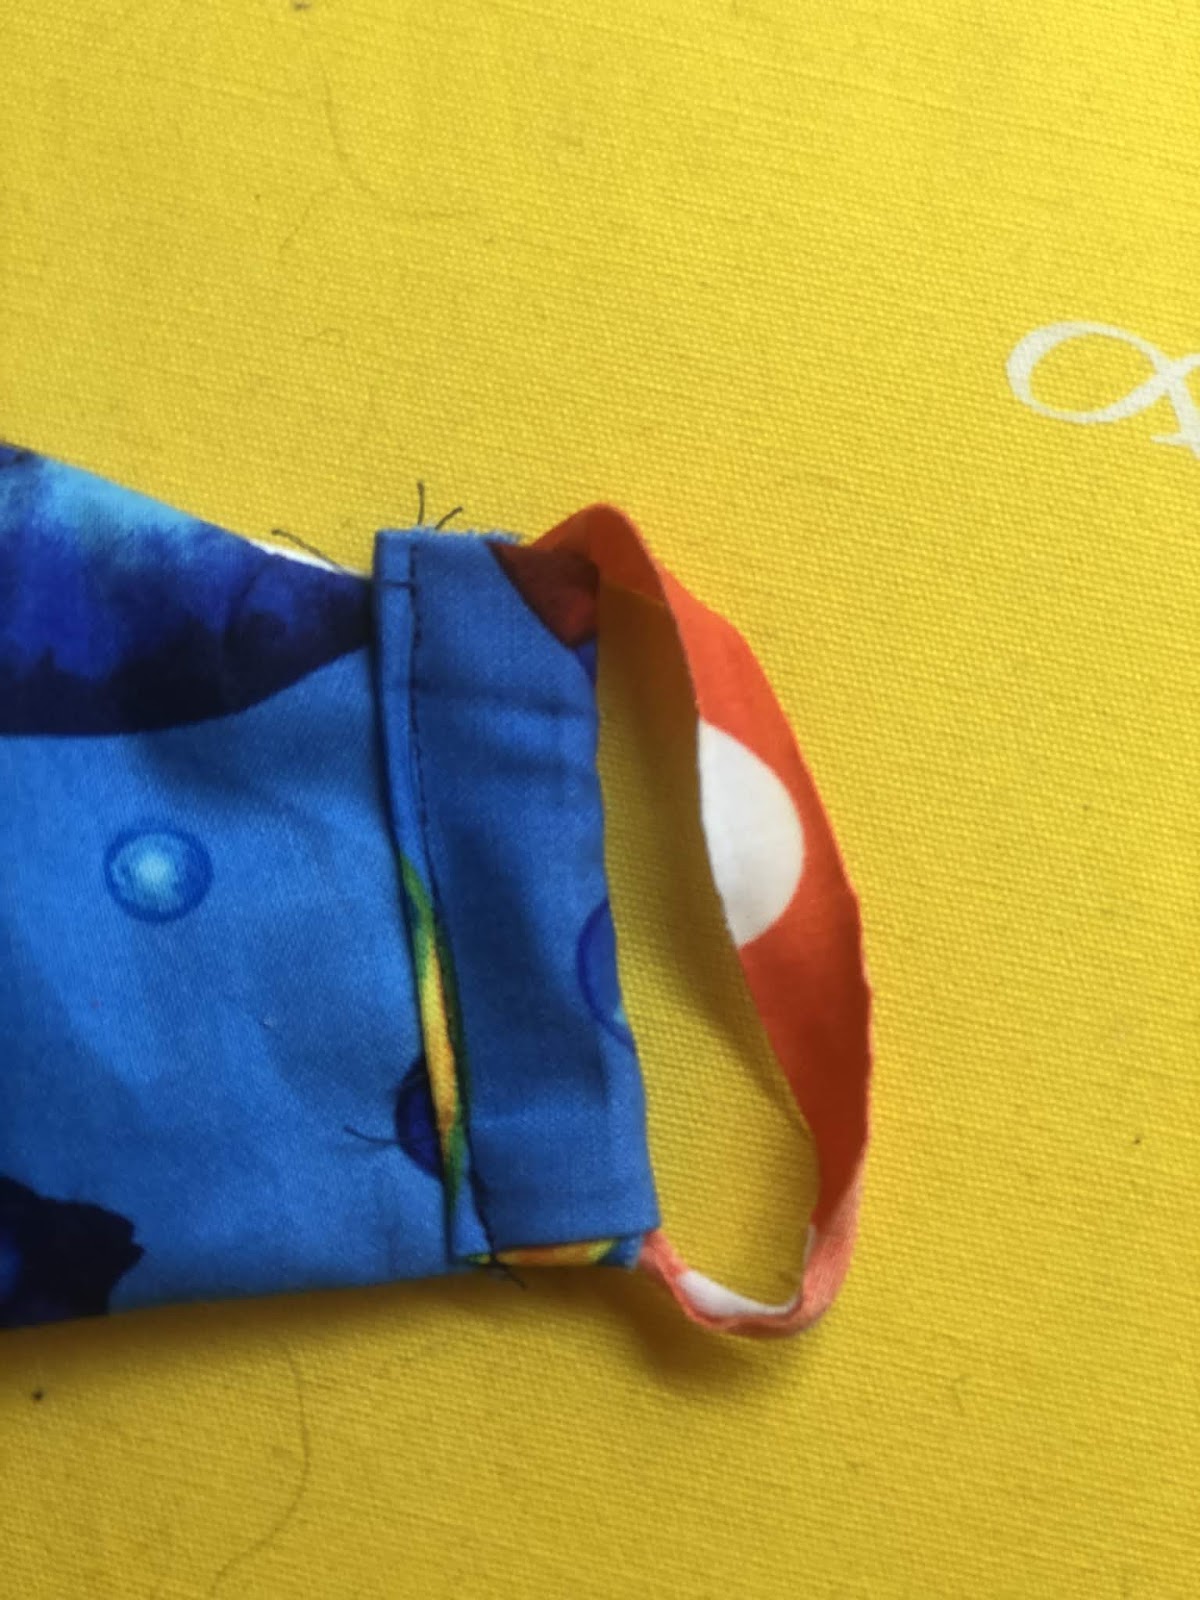
You have made a pocket to thread your earpiece through.
Repeat on the other end of the mask.
PITTING ON YOUR ELASTIC EARPIECES.
1. I used a bodkin, but you can use a bobby-pin to drag the end of elastic through the tunnel you made with the bias tape.

2. Tie a knot in the end

3. You can hide the knot in the tunnel if you want it prettier.
READY TO WEAR


Comments
Post a Comment